Monday, 21 October 2013

Switching Login and Registration form with html 5 and css


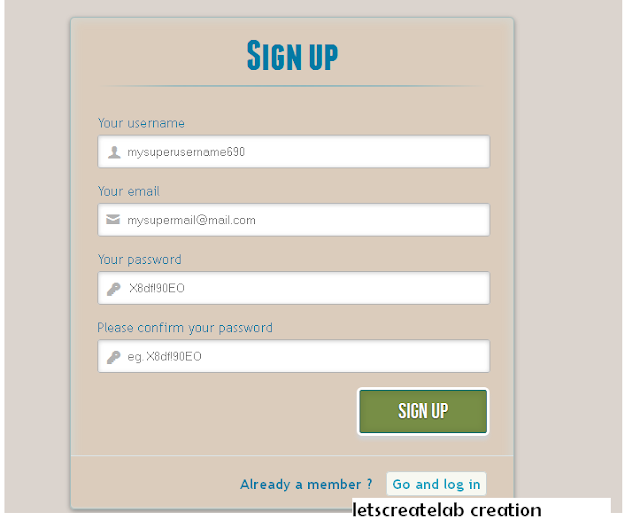
In this tutorial we are going to create two HTML5 forms that will switch between login and registration using the CSS3 pseudo class :target.We are using CSS3 animation framework from Dan Eden.Thsi Login Form Will Work As a swich from login to registration and vice versa.

IMP
Note that this is for demo purpose only, it will only work in browser supporting the :target pseudo class, and you should not use this code on a live website without providing solid fallback.


DEMO HERE

The HTML

<h1>Log in</h1>
<p>
    <label for="username" class="uname" data-icon="u" > Your email or username </label>
    <input id="username" name="username" required="required" type="text" placeholder="myusername or mymail@mail.com"/>
</p>
<p>
    <label for="password" class="youpasswd" data-icon="p"> Your password </label>
    <input id="password" name="password" required="required" type="password" placeholder="venkatesh" />
</p>
<p class="change_link">
    Not a member yet ?
    <a href="#toregister" class="to_register">Join us</a>
</p>
<div id="register" class="animate form">
<form  action="myscript.php" autocomplete="on">
<h1> Sign up </h1>
<p>
    <label for="usernamesignup" class="uname" data-icon="u">Your username</label>
    <input id="usernamesignup" name="usernamesignup" required="required" type="text" placeholder="mysuperusername690" />
</p>
<p>
    <label for="emailsignup" class="youmail" data-icon="e" > Your email</label>
    <input id="emailsignup" name="emailsignup" required="required" type="email" placeholder="mysupermail@mail.com"/>
</p>......


Applying the stylesheet for both forms

#subscribe,
#login{
    position: absolute;
    top: 0px;
    width: 88%;
    padding: 18px 6% 60px 6%;
    margin: 0 0 35px 0;
    background: rgb(247, 247, 247);
    border: 1px solid rgba(147, 184, 189,0.8);
    box-shadow:
        0pt 2px 5px rgba(105, 108, 1090.7), 
        0px 0px 8px 5px rgba(208, 223, 226, 0.4) inset;
    border-radius: 5px;
}
#login{
    z-index: 22;
}

Creating the switching animation

The first thing to do is to hide the second form by setting the opacity to 0:

#register{ 
    z-index: 21;
    opacity: 0;
}

#toregister:target ~ #wrapper #register,
#tologin:target ~ #wrapper #login{
    z-index: 22;
    animation-name: fadeInLeft;
    animation-delay: .1s;
}
.animate{
    animation-duration: 0.5s;
    animation-timing-function: ease;
    animation-fill-mode: both;
}
@keyframes fadeInLeft {
    0% {
        opacity: 0;
        transform: translateX(-20px);
    }
     
    100% {
        opacity: 1;
        transform: translateX(0);
    }
}
#toregister:target ~ #wrapper #login,
#tologin:target ~ #wrapper #register{
    animation-name: fadeOutLeftBig;
}
@keyframes fadeOutLeft {
    0% {
        opacity: 1;
        transform: translateX(0);
    }
     
    100% {
        opacity: 0;
        transform: translateX(-20px);
    }
}

If you have any doubt or suggestion comment below


[Continue reading...]

Timeago using jquery and php

The timeago fuctionality is important feature in all sites either in comments system or in social network since it shows the time that event happend. In this tutorial we are going to see the use of two jquery plugins "timeago.js and livequery.js "

Live Demo here

 DEMO HERE

how to implement
<script type="text/javascript" src="js/jquery.timeago.js"></script>
<script type="text/javascript">
$(document).ready(function(){
$(".timeago").livequery(function() // LiveQuery 
{
$(this).timeago(); // Calling Timeago Funtion 
});
});
</script>
//HTML & PHP Code
<?php
$time=time(); // Current timestamp eg: 1371612613
$mtime=date("c", $time); // Converts to date formate 2013-06-19T03:30:13+00:00 
?>

You opened this page <a href='#' class='timeago' title="<?php echo $mtime; ?>"></a>
[Continue reading...]

Friday, 18 October 2013

Facebook Like Friend Suggestions effect using jquery

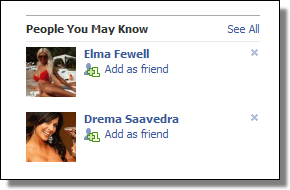
"People You May Know" of facebook

One of the Most popular Social networking feature "People you may know" on sidebar.Today ,we will se the tutorial on how to develop such effects using the Jquery,Html and css .You can develop such for your site with the database containing the profile image and just rotating the people.So you can have this featureon your site as well

The output will be


Designing The Page
index.html

<div style=" margin-top:40px; margin-left:30px" align="center">
<div id="left"style="padding-bottom:25px; font-size:15px ;float:left;">Click Delete Button "<b> X </b>"</div>
<span style=" padding-left:20px; font-weight:bold;">Suggestions</span>
<ul id="facebook">
<li id="list1">
<img src="img1.jpg" /> <span class="del"><a href="#" class="delete" title="Delete this user " id="1">X</a></span>
<a href="" class="user-title">Mark Zuckerberg</a>
<span class="addas">Add as Friend</span>
</li>

</ul><br/><br/><br/>
<h3 >
only Subscribers to get source through email</h3>
<div id="footer">
LetscreateLab production by venkatesh pillai
<a align="right" href="http://letscreatelab.blogspot.in" >Back to site</a>
</div>


Adding The effects to The Page

$(function()
{
$(".delete").click(function(){
var element = $(this);
var I = element.attr("id");
$('li#list'+I).fadeOut('slow', function() {$(this).remove();});      
return false;
});
});

Applying The stylesheet

*{margin:0;padding:0;}
#facebook{
height:60px;
width:250px;
overflow:hidden;
background:#F4F8FF;

padding:6px 10px 14px 10px;;
}
#facebook li{
border:0; margin:0; padding:0; list-style:none;
}

#facebook li{
height:60px;
padding:5px;
list-style:none;

}
#facebook a{
color:#000000;
text-decoration:none;

}
#facebook .user-title{
display:block;
font-weight:bold;
margin-bottom:4px;
font-size:11px;
color:#36538D;
}
#facebook .addas{
display:block;
font-size:11px;
color:#666666;
}
#facebook img{
float:left;
margin-right:14px;
padding:4px;

}
#facebook .del
{
float:right; font-weight:bold; color:#666666
}
#facebook .del a
{
color:#000000;
}
#facebook .del a:hover
{
background-color:#36538D;
padding-left:1px;
padding-right:1px;
color:#ffffff;
}

Please subscribe to our newsletter to Get the source code.only subscribed user to get the source code

Comment below what you think of this if you have any suggstion  you are welcomed Keep commenting!

[Continue reading...]

Thursday, 17 October 2013

Inspiring Contact form to learn from

I have visited many site in my internet surfing hobby and i have inspired from a lot of stuff from many sites here are some of the contact form i have inspired from and I also created a lot of great contact form but here some web stuff these are some of great inspiring contact form try to develop by youself and have fun 


Bold Contact Page from Mixd


Bold Contact Page from Mixd


Signup Form from Involvio Orientation

Signup Form from Involvio Orientation 


Bold Contact Form from Denise Chandler

Bold Contact Form from Denise Chandler

Drop In Contact Form from Online Department

Drop In Contact Form from Online Department 

Innovative Submission Form from Simple as Milk

Innovative Submission Form from Simple as Milk


[Continue reading...]

Youtube old Style Menu

Google has just changed the UI of the youtube but the old menu system was just inspiring. so i tried to design it and completed within 20 min and said myself "that was nice!" .So i decided to share the tutorial with all of friends and followers.The concept is just simple and i used a js file "ytmenu.js" and the result was there!
I used simple icons to make more interesting and fun try the demo and comment  your feeling.


DEMO HERE
 
Creating The Page
Index.html

<body>
<div class="container">
<header class="header">
<h1>Simple YouTube Menu Effect <span text color="red">A simple drop-down menu as seen on YouTube</span></h1>
</header>
<div class="main">
<p text align="center">YOUTUBE'S OLD STYLE MENU </p>
<div class="side">
<nav class="dr-menu">
<div class="dr-trigger">

<span class=" icon-menu"></span><a class="label">Account</a></div>
<ul>
<li><a class="icon-user" href="#">Venkatesh Pillai</a></li>
<li><a class="icon-camera" href="#">Videos</a></li>
<li><a class="heart" href="#">Favorites</a></li>
<li><a class="bullhorn" href="#">Subscriptions</a></li>
<li><a class="download" href="#">Downloads</a></li>
<li><a class="settings" href="#">Settings</a></li>
<li><a class="icon-switch" href="#">Logout</a></li>
</ul>
</nav>
</div>
</div>
</div>
</div>


<script src="js/ytmenu.js"></script>
</body>


Styling The Menu
component.css

.menu {
    width: 100%;
    max-width: 400px;
    min-width: 300px;
    position: relative;
    font-size: 1.3em;
    line-height: 2.5;
    font-weight: 400;
    color: #fff;
    padding-top: 2em;
    float:right;
}

.menu > div  {
    cursor: pointer;
    position: absolute;
    width: 100%;
    z-index: 100;
}

.menu > div .icon {
    top: 0;
    left: 0;
    position: absolute;
    font-size: 150%;
    line-height: 1.6;
    padding: 0 10px;
    -webkit-transition: all 0.2s ease;
    -moz-transition: all 0.2s ease;
    transition: all 0.2s ease;
}

.menu.menu-open > div .icon {
    color: #1C73FF;
    left: 100%;
    -webkit-transform: translateX(-100%);
    -moz-transform: translateX(-100%);
    -ms-transform: translateX(-100%);
    transform: translateX(-100%);
}

.menu > div .icon:after {
    content: "\e008";
    position: absolute;
    font-size: 50%;
    line-height: 3.25;
    left: -10%;
    opacity: 0;
}

.menu.menu-open > div .icon:after {
    opacity: 1;
}

.menu > div .label {
    padding-left: 3em;
    position: relative;
    display: block;
    color: #1C73FF;
    font-size: 0.9em;
    font-weight: 700;
    letter-spacing: 1px;
    text-transform: uppercase;
    line-height: 2.75;
    -webkit-transition: all 0.2s ease;
    -moz-transition: all 0.2s ease;
    transition: all 0.2s ease;
}

.menu.menu-open > div .label {

    -webkit-transform: translateY(-90%);
    -moz-transform: translateY(-90%);
    -ms-transform: translateY(-90%);
    transform: translateY(-90%);
}

.menu ul {
    padding: 0;
    margin: 0 3em 0 0;
    list-style: none;
    opacity: 0;
    position: relative;
    z-index: 0;
    pointer-events: none;
    -webkit-transition: opacity 0s linear 205ms;
    -moz-transition: opacity 0s linear 205ms;
    transition: opacity 0s linear 205ms;
}

.menu.menu-open ul {
    opacity: 1;
    z-index: 200;
    pointer-events: auto;
    -webkit-transition: opacity 0s linear 0s;
    -moz-transition: opacity 0s linear 0s;
    transition: opacity 0s linear 0s;
}

.menu ul li {
    display: block;
    margin: 0 0 5px 0;
    opacity: 0;
    -webkit-transition: opacity 0.3s ease;
    -moz-transition: opacity 0.3s ease;
    transition: opacity 0.3s ease;
}

.menu.menu-open ul li {
    opacity: 1;
}

.menu.menu-open ul li:nth-child(2) {
    -webkit-transition-delay: 35ms;
    -moz-transition-delay: 35ms;
    transition-delay: 35ms;
}

.menu.menu-open ul li:nth-child(3) {
    -webkit-transition-delay: 70ms;
    -moz-transition-delay: 70ms;
    transition-delay: 70ms;
}

.menu.menu-open ul li:nth-child(4) {
    -webkit-transition-delay: 105ms;
    -moz-transition-delay: 105ms;
    transition-delay: 105ms;
}

.menu.menu-open ul li:nth-child(5) {
    -webkit-transition-delay: 140ms;
    -moz-transition-delay: 140ms;
    transition-delay: 140ms;
}

.menu.menu-open ul li:nth-child(6) {
    -webkit-transition-delay: 175ms;
    -moz-transition-delay: 175ms;
    transition-delay: 175ms;
}

.menu.menu-open ul li:nth-child(7) {
    -webkit-transition-delay: 205ms;
    -moz-transition-delay: 205ms;
    transition-delay: 205ms;
}


.menu ul li a {
    display: inline-block;
    padding: 0 20px;
    color: #fff;
}

.menu ul li a:hover {
    color: #1C73FF;
    background-color:#fff;
}

.icon:before,
.icon:after {
    position: relative;
    font-family: 'icomoon';
    speak: none;
    font-style: normal;
    font-weight: normal;
    font-variant: normal;
    text-transform: none;
    -webkit-font-smoothing: antialiased;
}

[Continue reading...]

Expandable Search bar with Css

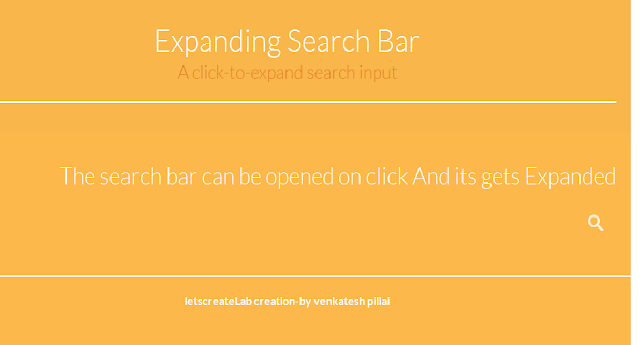
I was just thinking that today Lot of Website Contains search bar with expandable effects so I decided to have that tutorial on that effects . So today we will learn how to create an Expandable search bar effects with simple HTML and CSS .The main Advantage of this is that it requires less space on the website and it can expand over other Elements also.

DEMO HERE

creating the page
Index.html

<body>
<div class="container">
<!-- Top Navigation -->
<header>
<h1>Expanding Search Bar <span>A click-to-expand search input</span></h1>
<hr color="white">
</header>
<p>The search bar can be opened on click And its gets Expanded</p>
</div>
<div >
<div id="sb-search" class="sb-search">
<form>
<input class="sb-search-input" placeholder="Search Here.." type="text" value="" name="search" id="search">
<input class="sb-search-submit" type="submit" value="">
<span class="sb-icon-search"></span>
</form>

</div>
</div>
</div>
</div><!-- /container -->
<script src="js/classie.js"></script>
<script src="js/uisearch.js"></script>

<script>
new UISearch( document.getElementById( 'sb-search' ) );
</script>
<hr color= "white">
<div class="footer">
<center><h4 >LetscreateLab creation-by venkatesh pillai</h4></center>
</div>

</body>


Styling The Page 
component.css 

.sb-search {
opacity:0.8;
    position: relative;
    margin-top: 10px;
    width: 0%;
    min-width: 60px;
    height: 60px;
    float: right;
    overflow: hidden;
    -webkit-transition: width 0.3s;
    -moz-transition: width 0.3s;
    transition: width 0.3s;
    -webkit-backface-visibility: hidden;
   
}

.sb-search-input {
    position: absolute;
    top: 0;
    right: 0;
    border: 2px #FFFFFF;
    outline: none;
    background: #fff;
    width: 84%;
    height: 60px;
    margin: 0;
    z-index: 10;
    padding: 20px 65px 20px 20px;
    font-family: inherit;
    font-size: 20px;
    color: #FC6907;
}

.sb-search-input::-webkit-input-placeholder {
    color: #0066FF;
}

.sb-search-input:-moz-placeholder {
    color: #0066FF;
}

.sb-search-input::-moz-placeholder {
    color: #0066FF;
}

.sb-search-input:-ms-input-placeholder {
    color: #0066FF;
}

.sb-icon-search,
.sb-search-submit
  {
    width: 60px;
    height: 60px;
    display: block;
    position: absolute;
    right: 0;
    top: 0;
    padding: 0;
    margin: 0;
    line-height: 60px;
    text-align: center;
    cursor: pointer;
}

.sb-search-submit {
    background: #fff;
    filter: alpha(opacity=0);
    opacity: 0;
    color: transparent;
    border: none;
    outline: none;
    z-index: -1;
}

.sb-icon-search {
    color: #fff;
    background: #FCB84B;
    z-index: 90;
    font-size: 22px;
    font-family: 'icomoon';
    speak: none;
    font-style: normal;
    font-weight: normal;
    font-variant: normal;
    text-transform: none;
    -webkit-font-smoothing: antialiased;
}

.sb-icon-search:before {
    content: "\e000";
}


styling Searchbar open state

/* Open state */
.sb-search.sb-search-open,
.no-js .sb-search {
    width: 100%;
}

.sb-search.sb-search-open .sb-icon-search,
.no-js .sb-search .sb-icon-search {
    background: #da6d0d;
    color: #fff;
    z-index: 11;
}

.sb-search.sb-search-open .sb-search-submit,
.no-js .sb-search .sb-search-submit {
    z-index: 90;


[Continue reading...]